Whether you're having a spring barbeque, summertime picnic, or a fall campfire, picnic tables are a great way to get the family outside. With a few simple tools, you can cut and assemble your own magnet for get-togethers for less than you'd think.
Before You Begin
Before you start the project, you should consider your lumber choice and understand the intricacies of measuring and cutting your pieces.
Treated Vs. Non-Treated Lumber
When building outdoor furniture you always want to consider the final product finish. If you are going to paint or stain your picnic table then treated wood isn't really necessary so long as you buy stains and paints that are weather tolerant. One untreated board will run you a bit less than one treated but over the whole project lumber could get pretty pricey if you're using treated wood. A gallon of weather resistant paint will dilute that cost better than the boards so it is more beneficial to consider the cost of paint and lumber before buying your materials.
Measure Twice, Cut Once
With every cut of the blade you will remove the width of the blade in material. This is known as the kerf of the blade. A standard kerf is 1/8" and could cost you a full 1/4" inch of material with four cuts. That may not sound like much but if you are estimating your materials for a project you could end up short because of kerf. For instance, a 10 foot board cut into three pieces would lose 3/8" of material but if that same board is cut eight times you would lose 1/2".
This is also why you never mark a board with multiple cuts because you will always be short. Instead, use a pre-measured stop from the outside blade edge to push your board against. Even though it takes extra time to make this stop, this little trick will provide the perfect length every time.
How to Build a Picnic Table
The following set of instructions and free printable picnic table plan creates an eight foot long standard picnic table. Carriage bolts need to be seated into the wood with a hammer before tightening the nuts so you can get the most secure fit possible.
Materials

- 1 printable Abobe plan (to the right)
- 2 each 2" x 6" x 2' 9" boards (A)
- 2 each 2" x 6" x 6' 6" boards (B)
- 2 each 2" x 6" x 2' 9 5/8" boards (C)
- 4 each 2" x 4" x 2' 8" boards w/30 degree miter cuts top and bottom (D)
- 1 each 2" x 4" x 1' 8" board (E)
- 9 each 2" x 6" x 8' boards (F)
- 18 each 5/16" -18 x 4 1/2" stainless steel carriage bolts*
- 20 each 5/16" x 4 1/2" stainless lag bolts
- 18 each 5/16" -18 stainless nuts*
- 38 each 5/16" stainless washers
- 2 1/2" pallet nails, as needed
- 80 grit sandpaper, as needed
*Note: The -18 for the nut and carriage bolt represents thread size. Be sure to match thread size or you will cross-thread the nut and bolt when assembling.
Tools
- Drill w/ bits
- Orbital sander
- Hammer
- Wrenches
- Miter saw
- Clamps
- Carpenters square
Procedure
- Align one end of board D 3" inches from the end of board A. Clamp and drill 5/16" hole through both boards 1" inch from the edge.
- Repeat with a second board D on the opposite end of board A. Bolt boards together with two carriage bolts washers and nuts.
- Place the bottom edge of board B on the assembled D 7 3/4" inches from the foot on both. Clamp both sides and drill holes through both boards.
- Bolt together with carriage bolts, washers, and nuts. Repeat for opposite side of table. Set one ABD frame aside.
- Mark three F boards 1' 4 9/16" inches from the edge. Center the three boards on top of one ABD frame and clamp in place.
- Drill holes through each F board and bolt in place using lag bolts and washers. Repeat with the second ABD frame for the opposite side.
- Turn table upside down and clamp board E perpendicular and centered to the three F boards. Drill and bolt using carriage bolts, washers and nuts.
- Use board C to square the ABD frames to the three F boards and clamp. Drill through board B on both frames and bolt to C using lag bolts and washers.
- Nail board C to E using pallet nails. Stand table upright. Drill and attach remaining top F boards to ABD frames with lag bolts and washers.

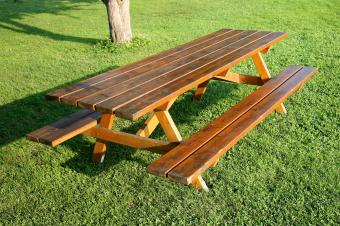
Completed table from plan - Align two each side F boards on lower boards B with upper F table top. Drill and bolt F to B with lag bolts and washers.
- Drill and bolt secondary carriage bolts, washers and nuts in both ABD frames to stabilize entire table. Ensure all bolts are tight.
- Sand entire project smoothing out rough edges and splintered areas. Paint, stain, or seal finished project. Enjoy!
Alternative Table Plans
The internet is full of ideas for picnic table designs and styles if you are looking for something more elaborate. A nice octagonal design could fit well for a smaller deck or outdoor area or you could extend the top boards over the edge of the frame to create a wheelchair accessible variation of just about any picnic table design. Any way you cut it, the picnic table is one of the most flexible woodworking projects around, and with so many variations, there is no end to how many ways you can get together.


